Connect to Azure Service Bus
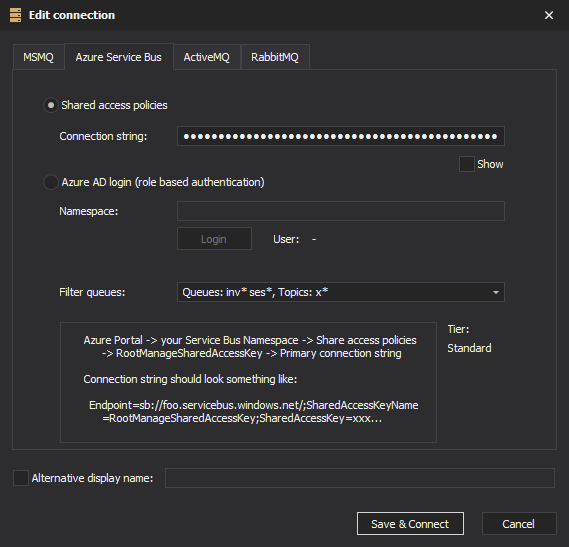
There are two way you can connect to Azure Service Bus - using Shared access policy (connection string), and using Azure Active Directory login (role based authorization). Azure AD login allows more fine grained permissions - can be set differently for each queue or topic.
Connect using Azure Active Directory login
Enter namespace first (and optionally Tenant ID), then click on the Login button. Login procedure will be performed by Microsoft’s login dialogs, outside of QueueExplorer’s window. If this is the first time anyone from your organization is logging through QueueExplorer, login dialog will ask you to allow QueueExplorer access to Service Bus. Note that this is a necessary step that doesn’t allow QueueExplorer access to everything. QueueExplorer will impersonate (i.e. login as) the user, and will have only user’s permissions regarding Service Bus. QueueExplorer doesn’t have access to users’s password, it’s handled by Microsoft login dialogs. QueueExplorer only gets a token valid for Service Bus operations.
QueueExplorer requires that you grant user at least some kind of read access to Service Bus entities - in order to get a list queues, topics, etc. The easiest (read-only) way is to assign ‘Reader’ role for entire namespace. You can assign other roles on entire namespace, or on individual queues/topics, etc.
Tenant ID
When user’s account is in different tenant from service bus namespace, you should enter Tenant ID of target tenant, i.e. where service bus resides. In this case, user will be “external guest” in that tenant.
Azure Roles and QueueExplorer
- Owner - can read a list of queues/topics, delete or create them. However this role doesn’t give you any access to messages in these queues/subscriptions!
- Contributor - same as Owner from QueueExplorer’s point of view, since QueueExplorer doesn’t have role/user/permission management anyway, which Owner account has and Contributor doesn’t.
- Reader - can read a list of queues/topics, but can’t edit them. Any QueueExplorer user should have at least this.
- Azure Service Bus Data Owner - enables data access to Service Bus namespace and its entities (queues, topics, subscriptions, and filters)
- Azure Service Bus Data Sender - use this role to give send access to Service Bus namespace and its entities.
- Azure Service Bus Data Receiver - use this role to give receiving access to Service Bus namespace and its entities. Please note that this role includes deleting messages (which is in fact - receiving)!
Filtering of queues and topics
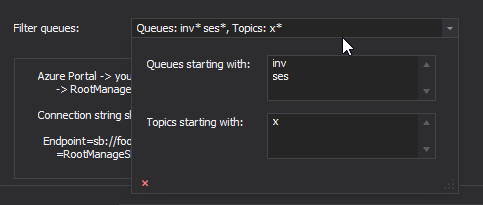
For performance reasons you may want to limit amount of queues and topics QueueExplorer loads. You can use “Filter queues” setting for that. QueueExplorer will load only queues and topics starting with specific text. You can use multiple filters, each in separate line.